Friday, January 31, 2014

Persimmon Cake

For most people, if you ask them about persimmons, they have no idea what you're talking about.  Or if you show them one, they think it is some form of tomato or tomatillo.  Not so my friends.  This is actually a super sweet, delectable fruit that abounds in the Southern U.S. and Asia.


For some reason, maybe because my mother's parents are from the South, I've always known what persimmons are, but never actually tasted one until last December.  I received about six persimmons in my Bountiful Basket, as that is the time of year that they are in season.  I knew exactly what they were, but had no idea what to do with them.  So I turned to the interweb and eventually The Joy of Cooking for a recipe for persimmon pudding.  Now this is a traditional pudding (like figgy pudding) where you cook it in small ramekins in a water bath in the oven.  Needless to say this was a pretty labor intensive process, but oh so delicious in the end. :)

So this December when I saw a pack of 10 persimmons at Costco for a relatively inexpensive price, I picked them up.  The ones I bought were very unripe, and believe it or not were not ready to use until this last week.  I really didn't want to go through the whole process of making the pudding again, so decided to substitute them in a recipe I make all the time that uses super ripe bananas.

Now this was my first time experimenting with a baking recipe.  I don't usually do this, since to me a baking recipe is like a science protocol for making media or salt solutions, they're tried and true and any variation will probably result in disaster.  But I went out on a limb and experimented away.  So here is my recipe for Persimmon Cake:

Persimmon Cake
  • 1/3 c. buttermilk or regular milk
  • 2 eggs
  • 3 very ripe persimmons (we're talking mushy/look rotten ripe)
  • 3/4 c. sugar
  • 2/3 c. butter, melted
  • 1 tsp. salt
  • 1 tsp. baking soda
  • 1/4 tsp. baking powder
  • 1 1/4 c. whole wheat flour
  • 1 1/4 c. all-purpose flour
  1. Preheat oven to 350 degrees F for conventional baking or 325 degrees F for convection baking.
  2. Using a stand or hand mixer, combine milk, eggs, persimmons, and sugar.  Slowly pour in melted butter.
  3. While mixer is running, add salt, baking soda, and baking powder.
  4. Add whole wheat flour and mix until combined.  Then add all-purpose flour and mix until combined.
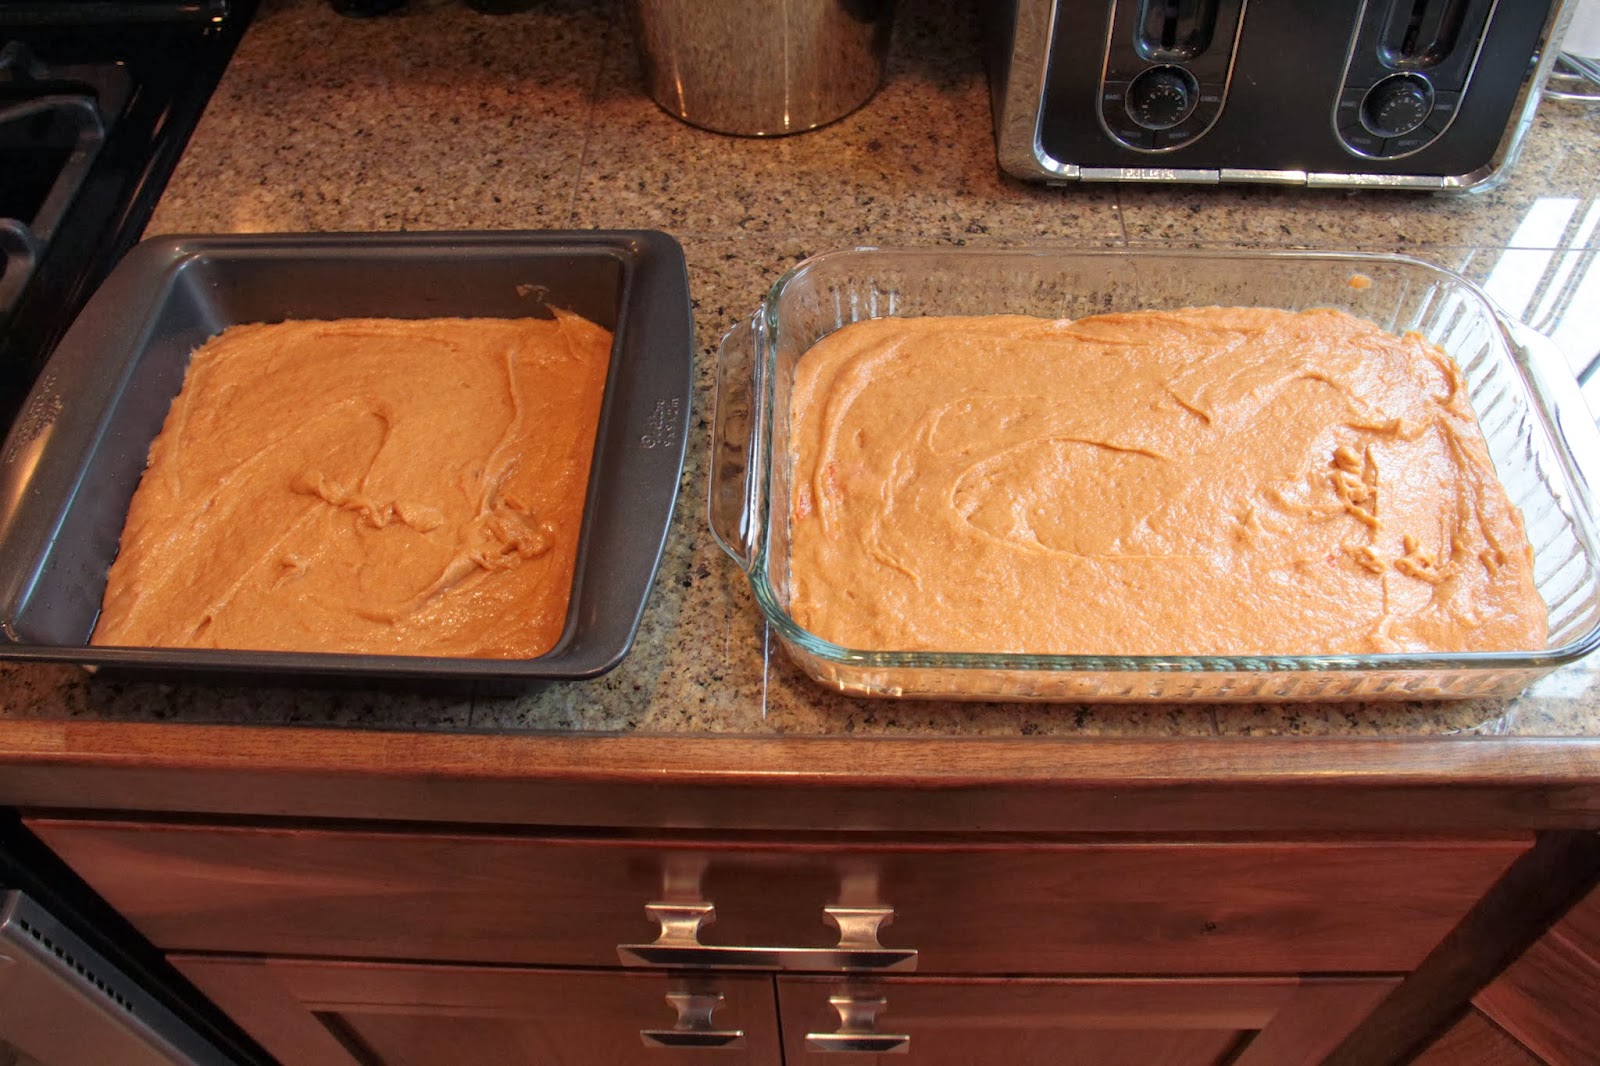
  5. Grease an 8x8 inch pan or two medium sized loaf pans.
  6. Pour batter into pans and bake for ~35 min.
I made a double batch (except forgot to double the eggs, but remembered before it was too late), since I needed to use up all of my persimmons.


To prepare the persimmons, I cut them in half and scooped out the insides with a spoon.


Tada!  The finished product, which turned out quite good.  Not quite as I expected, but still really good. :)


Notes: This makes a really good breakfast cake that is mildly sweet.  It was excellent with some butter and even better when I added a drizzle of honey.  And frosted with homemade cream cheese frosting it was amazing!  I actually cut back the sugar from the original recipe, because the persimmons are so naturally sweet.  So if you want a sweeter cake that would be great without any additional sweetener (honey/frosting), up the sugar to 1 2/3 cups.  I also substituted whole wheat flour for half the amount of all-purpose flour to make it healthier and a bit heartier.  So if you want a lighter tasting cake, just use 2 1/2 cups all-purpose flour. 

Thursday, January 30, 2014

Coconut Vanilla Sugar Scrub

Yum, coconut vanilla!  What a great combination.  This homemade body scrub is super simple to make and smells heavenly.  It smells so good you'll want to eat it, which you could.  I love it especially for this time of year, because it makes my skin feel amazing and transports me to the tropics.  At least in my head, that is. :)

Here are the 3 ingredients you'll need:
  • Sugar
  • Coconut Oil (I find the best place to buy coconut oil is at Costco.  You get 73 fl. oz. for ~$23)
  • Vanilla Extract

Measure out your sugar into a mixing bowl.  I usually use whatever container I'll be putting the scrub in to do this.  I pour the sugar in the container until it is about a half inch from the top.


Put your coconut oil in a microwave safe container and microwave for about a minute or until it is liquified.


At this point you will want to add a 1/2 Tbsp. of vanilla extract to your coconut oil and stir to emulsify.


Slowly stir the coconut oil/vanilla into the sugar, adding a little bit of liquid at a time.


Now that you have your 3 ingredients well mixed, spoon your scrub into whatever container you plan to keep it in (This is actually a pretty candle jar that I re purposed after the candle was done).


Now you're ready to use your own homemade sugar scrub.  I use it at the very end of my shower, then pat myself dry, and don't even need to use lotion.  The coconut oil soaks right into your skin and makes it so soft without feeling greasy. 

Wednesday, January 29, 2014

Cute And Comfy

Cute and Comfy?  Wait did those two words just end up together?  Heck yes, they did!  Since I spend most of my days at home, with no chance of seeing another human except my husband, I often don't feel the need/desire to dress up.  However, I try to always change out of my PJs and into actual clothes.  And although I often (especially these days) just want to be comfortable, I also don't want to look frumpy.  So here is my version of a Cute and Comfy outfit for around the house.  And trust me when I say it is very comfortable. :)


Top - H&M Mama Jersey Top (similar) $12.95;  Cardigan - Target Merona Long Sleeve Cardigan Sweater (similar) $22.99;  Pants - Target Liz Lange Basic Legging Pants $16.99;  Shoes - Payless Dexflex by Dexter Claire Scrunch Flat $19.99;  Scarf - Target Merona Polka Dot Scarf $14.99;  Earrings - already in my jewelry box

Maternity clothes often come in basic black, white, and grey or some variation thereof, so I like to jazz things up with accessories.  I'm so not a neutrals kind of girl.  My scarf and earrings added just the right pop of color to not make me feel blah.

Tuesday, January 28, 2014

Cottage Pie

Lately I've been craving comfort food.  Things like lasagna, meat and potatoes, and basically anything casserole like.  I made one of my Make Ahead Crockpot Meals with mashed potatoes (which I have been craving like crazy) last week, and had a ton of left over potatoes.  I love Shepard's Pie, but don't like all the work it takes, so figured I'd use up my leftover mashed potatoes by making this dish.

I did some searching around on Pinterest for a recipe, but ultimately ended up going to the bible of cook books, the Joy of Cooking.  I love this cook book and think it is one everyone should have in their kitchen.  It has everything from how to do table place settings, to etiquette on how to serve courses, to ways to prep different cuts of meet and veggies, as well as a ton of great recipes.  It was from the Joy that I learned that what I was about to make (with some variations and additions of my own) was actually called Cottage Pie, since I was not using lamb as the meat in the dish.  So here it is, my version of Cottage Pie:


Big Red's Cottage Pie
  •  3 Tbsp. olive or vegetable oil
  • 1 medium onion, chopped
  • 6 cloves garlic (I'm a garlic lover, so you can definitely use less)
  • 1 green bell pepper, chopped (I used frozen, chopped peppers from my garden)
  • 1 can corn, drained
  • 1 lb. ground elk, beef, deer, moose, etc.
  • 1 Tbsp. flour
  • 3/4 c. beef or vegetable broth
  • 1 tsp. dried thyme
  • 1 tsp. dried rosemary
  • 1/8 tsp. (pinch) of nutmeg
  • 1 Tbsp. Worcestershire sauce
  • 2 Tbsp. A1 sauce
  • 2 Tbsp. cold butter, cut into small pieces
  1. Preheat oven to 400 degrees F.
  2. Heat a large skillet over medium heat and add olive oil.  
  3. Add onions, pepper, and garlic and cook until soft, about 10 min.
  4. Add ground meat and cook until browned.
  5. Add canned corn and flour and cook for about 3 minutes. 
  6. Add beef broth, thyme, rosemary, nutmeg, Worcestershire sauce, and A1 sauce.  Stir to combine.
  7. Reduce heat to low and simmer, stirring occasionally, until thickened, about 5 min.
  8. Let cool slightly and move to a large pie plate or small casserole dish.
  9. Spread the mashed potatoes over the top.
  10. Scatter the butter pieces over the top of the potatoes.
  11. Bake until the potatoes are browned and the dish is heated all the way through, about 30-35 min.
Note: The original recipe calls for onions, carrots, and celery as the three vegetables to use in the dish.  I often see peas as a substitute for the celery.  You could also just use 1 - 1 1/2 c. frozen mixed vegetables.  Basically, just pick the three veggies that sound best to you, and go for it. :)

Saturday, January 25, 2014

Burt's Bees Face Cloths

Today I wanted to share one of my favorite, go to beauty essentials.  I love, love, love the Burt's Bees Facial Cleansing Towelettes!


These are great, especially if you're somewhat lazy like me, and don't always do the best at washing your face before going to bed.  They remove all dirt and makeup like a champ, don't dry out my face, and are quick and easy.  In fact, in the summertime I don't even have to moisturize after using them.  They are a must for freshening up on long road trips, after time spent on the lake or river, or a long hike.  And I couldn't live without these when camping.  You can pick them up at Ulta or Target for $5.99 per 30 pack of towelettes.

Wednesday, January 22, 2014

Homemade Hand Soap

Here is another little gem I found on Pinterest: how to make your own homemade hand soap.  I was super interested in trying this DIY recipe from Melissa over at The Happier Homemaker.  It looked super easy to do and required only 3 ingredients, plus any way to not pay an arm and a leg for liquid hand soap refill, and I'm all in.

Here are the 3 ingredients you need:

Put your water in a large pot to boil.


While you're waiting for your water to boil, grate your soap using a standard cheese grater. (I used a small pairing knife to finish off the bar, so I didn't grate my fingers.)


Add grated soap and liquid glycerin to the boiling water.  Stir until all soap has been dissolved.  Remove from heat and allow to cool overnight.


Once it's cool, it will seem like it has solidified too much.  However, if you give it a good stir (I used a whisk) the concoction becomes quite viscous.  Now you're all set to fill your soap dispensers.  This makes quite a lot of liquid soap, so I stored the remainder in a sealed plastic jug.


Note: I used a funnel to get the soap into my dispenser and the jug.  You will want to do this step over the sink, as it can get a little messy.

I'm really enjoying my homemade hand soap.  I especially love that it cost roughly $5.40 for a whole gallon.  And I can pick whatever scent I want, by choosing different scented bar soaps.  I often see yummy smelling bar soap at World Market on clearance.  I will definitely be scooping those up from now on. :)

Tuesday, January 21, 2014

No Heat Curls

I found this great pin on Pinterest last night from Chelsey over at The Paper Mama on how to do a No Heat Curl.  She has really great instructions and a how to video.  I decided to give it a go and here is how it turned out.

Here I am first thing in the morning (seriously I just rolled out of bed).  


And here is how it turned out after I put some clothes on, washed my face, and threw on some makeup for all of you.


Not too bad, for having to do about 3-5 minutes of work the night before.  As you can see, my hair is quite a bit shorter and I have an extensive amount of layers.  Unfortunately my top layers on the sides and back didn't quite get 'curled' but they were fairly tamed down from the process.  I also have naturally wavy, really thick hair, that will hold a curl like nobodies business, so I didn't put any additional product in my hair.  I did spray a little of my favorite hair spray (Suave Professionals Touchable Finish Lightweight Hold Hairspray) all over, before I flipped my head upside down and finger combed out the curls.

In future, I will try using some Herbal Essences Tousle Me Softly Mouse in my hair before letting it air dry, and using two bands to try to get my top layers more curled.  This will definitely be going in my arsenal of easy hair styles.  Thanks, Chelsey!

Sunday, January 19, 2014

Maternity Photos

I am so excited about my maternity photos!  I am lucky that my mom (Sagebrush Photography) is an amazing photographer, and did such a fantastic job of making me look beautiful.  I am pregnant with twin boys, so decided I should have them done before I'm as big as a house.  Here are a few of my favorites:

I can't even begin to describe how much I love them.  I'm glad my boys will have these to look back on when they get older. :)

Saturday, January 18, 2014

Bread Maker Jam

Did you know that a lot of bread makers have a jam setting?  No, really, they do.  And guess what?  It's amazing and awesome and oh so easy.  I've made two batches of jam in my bread maker now, and both times it turned out fantastic, with hardly any work on my part at all.

Bread Maker Berry Jam
  • 3 c. strawberries, raspberries, blueberries, blackberries, etc. (can use a single type of berry or a mixture)
  • 1 c. sugar
  • 3 Tbsp. lemon juice
  • 1 pkg. (2 oz.) powdered fruit pectin 
  1. Remove stems and crush berries. (I just use my handy dandy Magic Bullet to blend the berries.  However, if you like chunkier jam, you may want to crush the berries by hand.)
  2. Place berries, sugar, lemon juice, and pectin in bread maker baking pan.  Stir to mix.
  3. Insert baking pan into bread maker and close the lid.
  4. Select the JAM setting and push START.
  5. Once the cycle is complete, use hot pads to remove the pan from the unit.
  6. Pour mixture into a refrigerator or freezer container or a canning jar.  Leave a 1/2 in. head space.
  7. If canning, boil jars for 10 min. or pressure can for 5 min.  Allow to cool and tighten lids.


 And you're done!  Delicious homemade jam with hardly any effort and all the rewards. :)

Just a note: For my first batch of jam I used the Real Lemon lemon juice and 3 Tbsp. was the right amount.  However, for the second batch I used the Santa Cruz Organic Lemon Juice that is not from concentrate, and 3 Tbsp. of this was a little over kill.  My jam actually tastes more like strawberry lemonade jam, which is still delicious, but not quite what I was expecting.  I think that 1 1/2 Tbsp. probably would have been the perfect amount for this type of lemon juice.

Friday, January 17, 2014

Laundry, Laundry...

It's a new year!  Time to organize and refresh.  My first project for this year was making my laundry room, which is right off of my kitchen, a prettier, more inviting space.  I figure if it looks nice, I'll hopefully not mind doing laundry as much. ;)


I found these pretty Threshold Milk Crate Baskets at Target ($20.29 each) to store my white rags and kitchen towels.


The cute metal Storage tote is from World Market ($25).  I used it for my Shout, dryer sheets, Woolite, bleach, dryer balls, and lingerie bags.  The glass jar for storing my baking soda was something I had around the house and re-purposed.  The Savannah Embossed Drink Dispensers are from World Market ($19.99 each).  I used these for my vinegar and laundry detergent.  The small Tablecraft Measured Pourer is also from World Market ($1.99).
   

I added this Threshold Turned Wood Table Lamp from Target ($24.99) to my counter, since my laundry room doesn't have the greatest lighting.  It helps a lot and is nice to leave on when I know I'll be getting home late.  The Laundry Wall Hook is from World Market ($15.99).  Not only does this give me a place to hang my hand towel now, but I'll be able to hang my sun hats for gardening on it this summer. :)

Make Ahead Crock Pot Meals

The other day while scrolling through my news feed on Facebook, I saw this post from a friend, 10 Easy Crock-Pot Freezer Meals - Mommy's Fabulous Finds.  I love using my slow cooker, so I checked it out and thought to myself, "This is genius!  Why have I never done this before?"

With this epiphany in mind, I made a list of all the things I didn't already have in my cupboard/fridge/freezer and made out for the grocery store.  In addition to the 10 meals listed in the link above, I added two of my own from a great cook book I found in the grocery store check out aisle last year.  I added Swiss Steak with Mushrooms and Onions and Country Captain Kitchen from America's Test Kitchen Slow Cooker Revolution (recipes below).


As you can see, I set everything out, prepped all the veggies, then added all the ingredients for each meal to a labeled gallon freezer bag with instructions for cooking on the bag.  And Voila!


Twelve crock pot meals all ready to be frozen for future use.  All together, with labeling the bags, setting out all the ingredients, prepping the vegetables, and assembling the meals it took me about 6 hours.  Which seems like a lot, but really only comes to 30 minutes per meal.  We've already tried the Sweet and Sour Meatballs, which was better than I expected it to be, and the Swiss Steak, which was awesome.  I will most likely supplement what I have left of these in another month or so, before the babies get here.  That way my husband and I can have a nice home cooked meal with no effort involved except dumping the bag of ingredients in the slow cooker.  Which I assume is all we'll have time for with two new babies in the house. :)


Swiss Steak with Mushrooms and Onions
  • 3 Tbsp. vegetable oil
  • 1 1/2 lbs. white mushrooms, sliced thin
  • 2 onions, halved and sliced thin
  • 1 Tbsp. minced fresh thyme or 1 1/2 tsp. dried
  • 1 1/2 tsp. paprika
  • 3/4 c. chicken broth
  • 1/4 c. dry sherry (I used sherry cooking wine found in the grocery store)
  • 1-2 lbs. beef stew meat cut into 1 inch chunks
  • 1/4 c. heavy cream
  • 2 Tbsp. cornstarch
  1. Place all ingredients except cream and cornstarch in your gallon freezer bag.
  2. When ready to use, thaw overnight in fridge.
  3. Put contents of bag in slow cooker and cook on High for 5-7 hours.
  4. When finished, skim excess fat from remaining liquid.
  5. In a small bowl whisk together cream and cornstarch.  Slowly add this to contents of crock pot while stirring.  
  6. Turn slow cooker off and allow liquid to thicken for about 5 minutes.
  7.  Serve over rice or egg noodles.  Salt and pepper to taste.

Country Captain Chicken
  • 2 onions, chopped fine
  • 1 green bell pepper, cut into 1/2 in. pieces 
  • 1 can (6 oz.) tomato paste
  • 2 Tbsp. curry powder
  • 4 garlic cloves, minced
  • 1 Tbsp. vegetable oil
  • 1 Tbsp. minced fresh thyme or 1 1/2 tsp. dried
  • 1 1/2 tsp. paprika
  • 1/4 tsp. cayenne pepper
  • 1 can (14.5 oz.) diced tomatoes
  • 1 c. mango chutney
  • 3/4 c. chicken broth
  • 4 bone-in chicken thighs, skin removed and fat trimmed
  • Salt and Pepper
  • 2 Tbsp. minced fresh parsley
  • 1 Granny Smith apple, cut in to 1/2 in. pieces
  • 1/4 c. sliced almonds, toasted
  1. Place all ingredients except salt, pepper, parsley, apple, and almonds in your gallon freezer bag.
  2. When ready to use, thaw overnight in fridge.
  3. Put contents of bag in slow cooker and cook on Low for 4-6 hours.
  4. When finished, skim excess fat from remaining liquid.
  5. Stir in parsley and salt and pepper to taste.
  6. Serve over rice and sprinkle with almonds and apple.